The student homepage is where students arrive when opening Navigator. Navigator allows students to schedule appointments with staff members who are using the Navigator Staff platform. Also, students can view their current term classes, shared notes or summary reports, and so students can see their term calendar. However, the primary use for the student homepage is to give students the ability to schedule appointments with advisors and tutors.

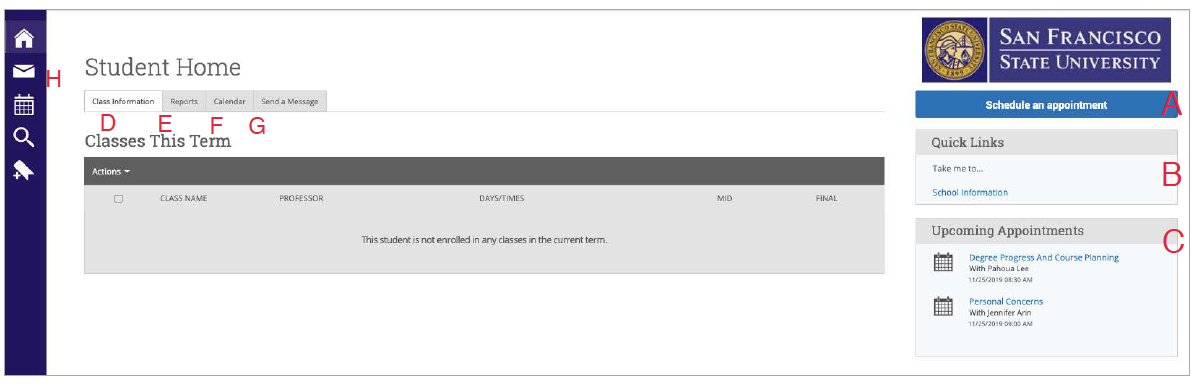
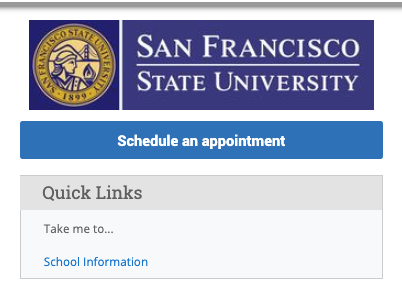
A: Schedule an Appointment
Step 1
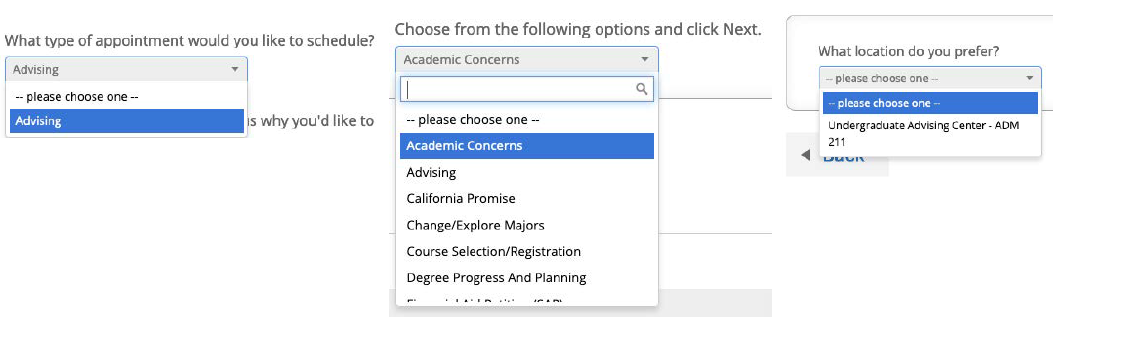
The SCHEDULE AN APPOINTMENT button opens the workflow for student-initiated appointment scheduling. From this screen, students can choose a LOCATION, SERVICE, and a time for their support appointment. A student will follow the prompts in the workflow to schedule and confirm their appointment.
Step 2
After selecting SCHEDULE AN APPOINTMENT, students will click through and make the following choices:
1. Select a CARE UNIT (Advising or Tutoring) 2. Select a SERVICE 3. Select a LOCATION
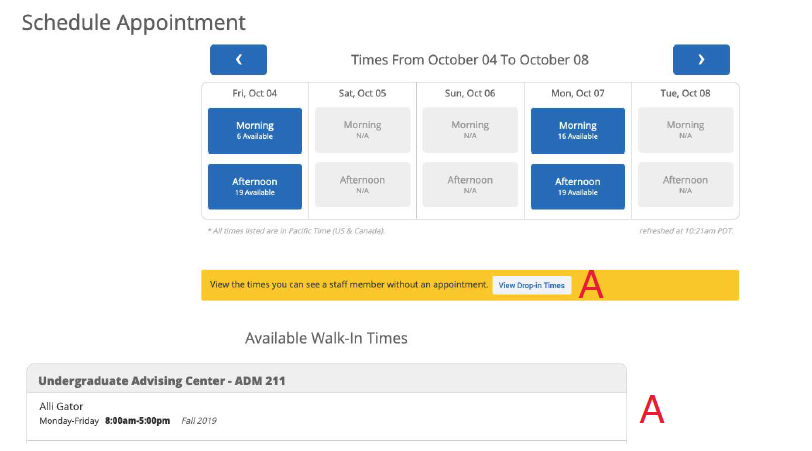
Step 3
Students will be presented with the availabilities for the SERVICE LOCATION and the SERVICE that they had selected. The student will be able to select a date and time from a list of availability by selecting the blue box in the "Morning" or "Afternoon". From this screen, students will also have the option to view (A)drop-in times.
Step 4
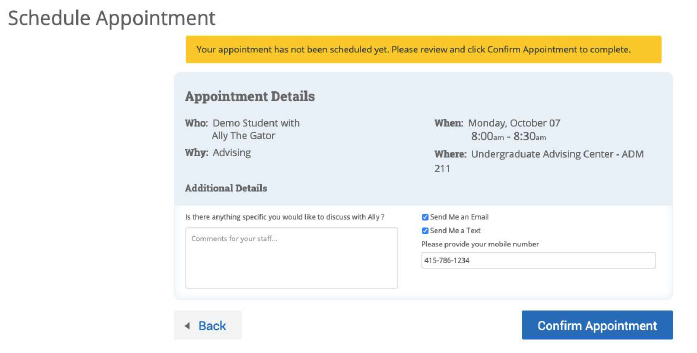
After making all their selections, the student will see a confirmation page with the details of their appointment. They have the option to use the COMMENTS box to leave a note for the staff member about what they are hoping to discuss in the appointment. The student will also have two options for receiving a reminder about the appointment; they can opt-in or out of receiving an email and/or text message about the appointment. Lastly, the student clicks CONFIRM APPOINTMENT.
NOTE: The student may input a mobile number on this screen. This option will send a text reminder to the student. This phone number is NOT saved in the system and it does not update People Soft.
Scheduling Campaign Appointments
Students can also respond to APPOINTMENT CAMPAIGN requests through the link in their email, through Navigator Student, or through this Student Home (a yellow banner will appear at the top of their home, prompting them to respond to the campaign request).
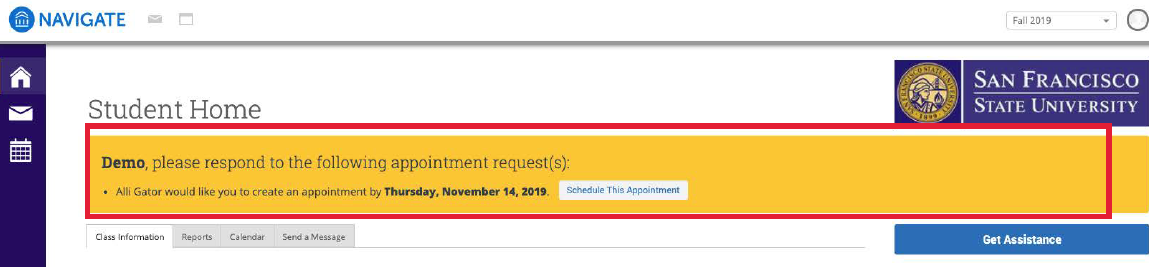
In this case, they will follow the same workflow detailed above except that the SERVICE and LOCATION will already be selected from the campaign settings. The student will select the staff member (if there are multiple in the campaign) and the time they want to meet.
The appointment the student scheduled will now appear in their list of upcoming appointments and on their calendar.
NOTE: the CARE UNITS, SERVICES, and LOCATIONS that displayed are all dependent on the configuration of the Navigator Staff platform and staff members having active availability for the selected services.
B: School Information
The SCHOOL INFORMATION link will connect students to important information about the institution, academic programs, and campus resources.

C: Upcoming Appointments - Info & Canceling
The UPCOMING APPOINTMENTS box shows quick details of the student's next five scheduled appointments. Appointments are listed in chronological order. For more detailed information, clicking on the title of the appointment link itself will take the student directly to the appointment details.

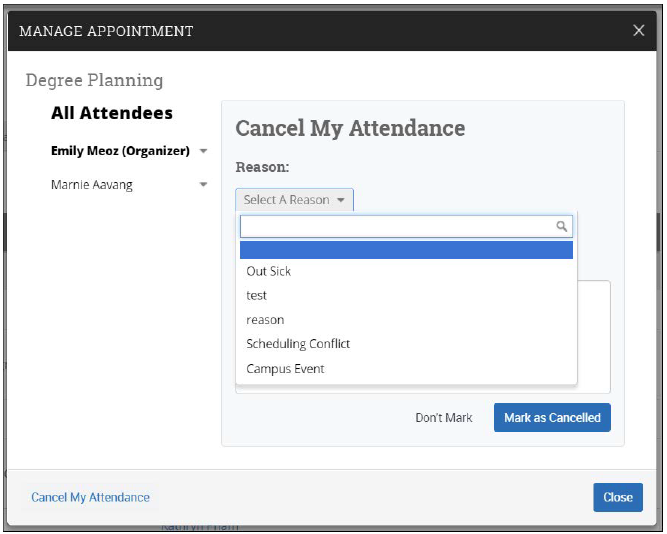
Canceling Appointments
From here, the student can cancel the appointment by selecting a cancellation reason and leaving any relevant comments. Select MARK AS CANCELLED.
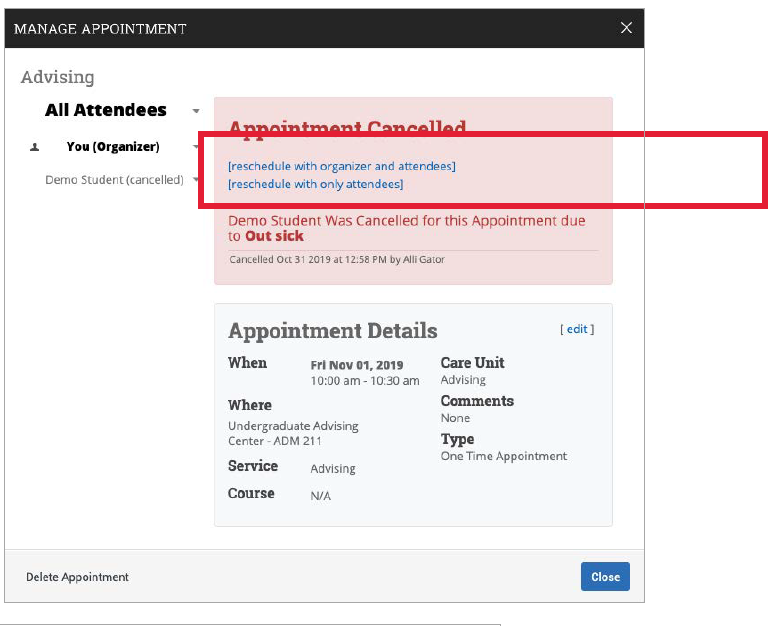
Once the student has canceled an appointment, a confirmation screen will appear. The confirmation screen will give the organizer the option to reschedule the canceled appointment for a later time.
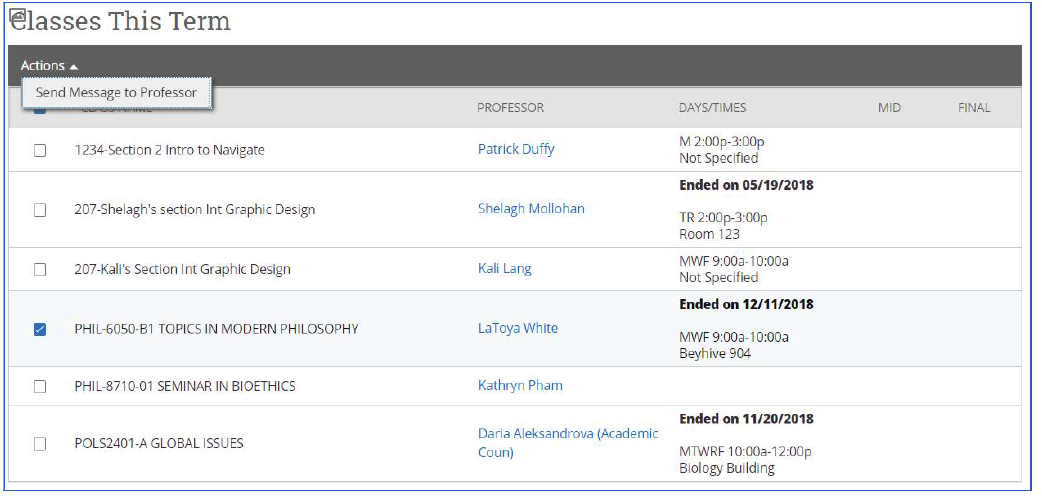
D: Class Information
Within the main CLASS INFORMATION tab, the CLASSES THIS TERM section displays all currently enrolled courses for the student, including the class name, professor, days/times, midterm grade, and final grade (as reported through your student information system). By selecting one or more of the classes, the Actions drop-down menu allows the student to contact their Professor through an email message on the platform.
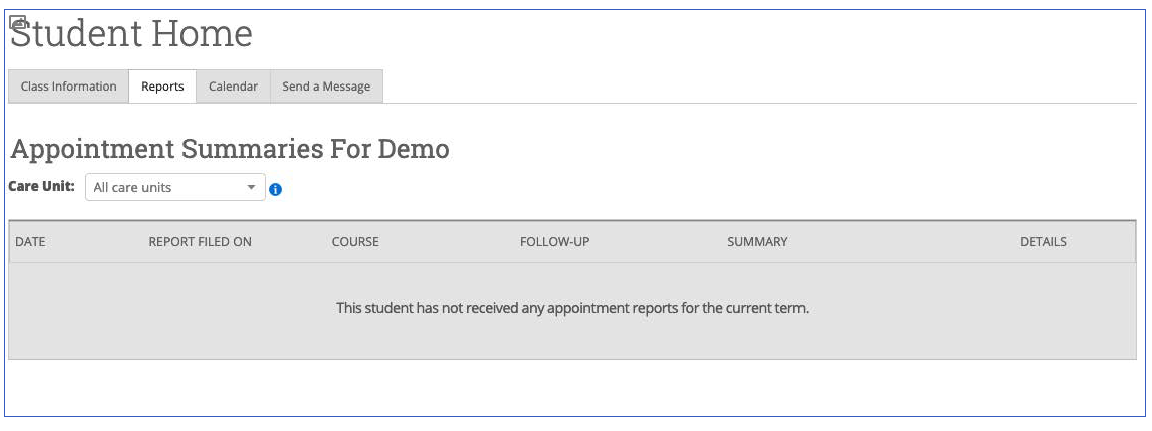
E: Reports Tab
The REPORTS tab provides the student with a view of the APPOINTMENT SUMMARY REPORTS created by advisors.
F: Calendar
The CALENDAR tab provides the student with a view of their calendar, including all appointments within Navigator, all currently registered courses, all assignments, and any busy times (only if the student chooses to sync a personal calendar to the platform).
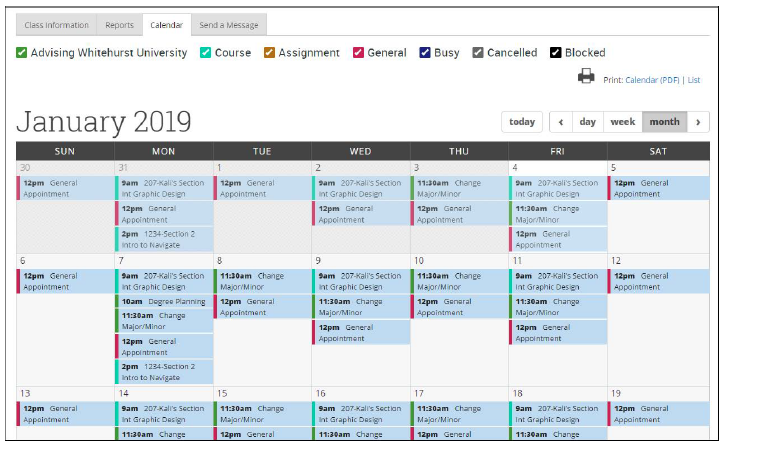
Tips - From this calendar view, the student can print or save their calendar to a PDF by selecting 'Calendar (PDF)' for a calendar grid version, or 'List' for a list version. Both options are to the right of the printer icon. The student can also click into the appointment to view more details as well as cancel the appointment.
G: Send Message
The SEND A MESSAGE tab provides the student with the option to message staff members supporting the student, in addition to the faculty members teaching their courses.
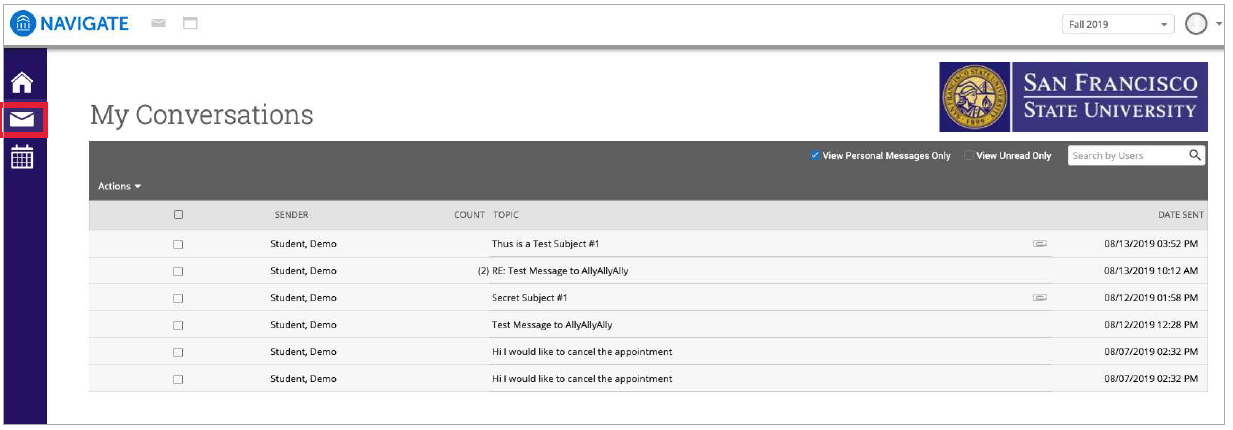
H: My Conversations
The CONVERSATIONS page, accessible by selecting the mail icon on the left navigation bar, allows the student to view all messages sent to and from them through the platform. The student's CONVERSATIONS page functions very similarly to the staff CONVERSATIONS page and the CONVERSATIONS tab included on the student's profile page.
For additional assistance, contact navigator@sfsu.edu.
Comments
0 comments
Please sign in to leave a comment.